Showing posts with label kitchen. Show all posts

Wednesday, April 8, 2015

An Easy Hand Painted Sign

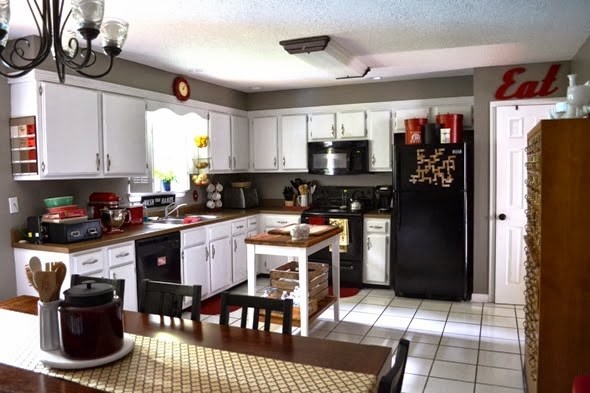
I love that we have a basement and a garage...because I can usually find supplies for a spur of the moment project already on hand. I had been wanting to add some type of vintage DIY sign to the kitchen in that little space above the cabinets.


Yesterday during nap times, I measured the space and took off to the garage, in search of a board. I found one that was the right dimensions. In fact, it was already painted white! It was the board we had removed from Nora's closet renovation.

I have been blessed with three AMAZING sets of grandparents. My sister and I pretty much agree that grandparents are supposed to last forever and that ours are the best in the world. All three of my grandpa's were such hard workers. I love finding ways to incorporate bits of their lives into our home.

My hard-working grandpa used to run a little grocery store. He's been called "Popeye" his entire life and so, the store was called "Popeye's Grocery." He is one of the most self-less people I know, working as hard as he could to provide for his family. I just love my Pa.


My mom grew up helping in the store after school so that my Nanny could cook supper. Mom would get to pick out the candy they would sell from the candy truck each week. I love listening to stories about the store. One day was bread delivery. Another day was pop. The bus stop for school was out in front of the store and so the kids would hang out here in the afternoon. You can see their school pictures displayed on the counter in the picture below.

Although the store is now closed, the building still stands on my Pa's property. I talked to my Pa last night about re-making the sign. He told me Pepsi provided the original one, as advertisement for their product. He was known for having the coldest pop in town. He would stock the coolers each evening after the store closed so that the bottles would be super chilled in the morning.

Photo by my sister Amy

Photo by my sister Amy

I wanted to honor my Pa's hard work and have a little reminder of the stories I've heard from the store. So, I decided to copy the original sign for my kitchen sign.

I found a font close enough to his hand-painted sign (Ariel Black). I had to use punctuation from another font (Eras Bold ITC) to match things up perfectly.


After printing and cutting the letters, I traced them with pencil onto my white board.


I had originally planned to paint the letters and then rough them up with a little sand paper. But I found that it was super easy to paint the letters in a weathered way. If my brush ran out of paint, I just left the faded area.


The whole project, start to finish, took less than 30 minutes.


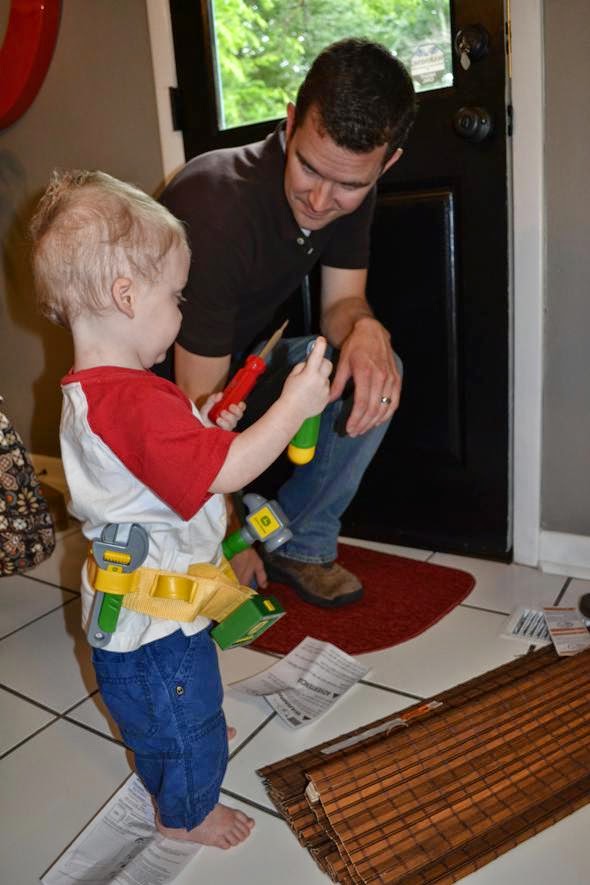
Jeremiah hung the board for me this afternoon using two picture frame hangers.


I love having a reminder of my family history hanging in my kitchen.


Sunday, June 29, 2014

Paint: an Inexpensive Remodel

I love that a coat or two of paint can make something seem brand new. Ever since I painted my kitchen walls "greige," I have been contemplating a back door re-make.


Each morning, as soon as I walk into the kitchen, I open the blinds on the back door. I like to be able to let the natural light flow into the room, and I enjoy seeing our backyard view. But I don't enjoy the stringy mess that the regular blinds made at the top of the door. I've tried curtains, yet I still felt that it wasn't quite the right look for this door.


(You can see a sneak peak of my baby girl's bedding draped over a kitchen chair. My mother-in-love is an awesome seamstress and she worked some magic during her last visit. More pictures to come soon!)

During Friday's naptime, I was able to apply a quick coat and a half of black paint to the door. Using a sponge roller and sponge brush, the job was accomplished quickly and neatly.


I was already pleased with how the black door now tied in nicely with our black appliances.


I had been watching online prices for bamboo shades. I thought the brown would tie in with my table and countertops. Finally, I found an awesome deal. JC Penney's had a 50% off sale and a coupon code for 15% off and free shipping to the store!

Saturday afternoon, after I was sure that the paint had dried properly, my helpful husband installed the blinds. Hudson loves his daddy and wants to be right in the middle of anything that Jeremiah is doing.


He even thought that his tool belt would help the process along.


I think Hudson was pleased with their work.


We shortened the string and removed the tags. I love that these blinds have a flap that covers up all the "stringy-ness" at the top.


And the brown was the perfect color, matching the table. I was worried that this might not be the case, guessing on my color selection online. But I knew that I could easily return the shade if the color was off.


My kitchen feels even more complete now, thanks to some paint and a new set of blinds.


Paint may be the poor man's way of remodeling, but in my opinion, it can make all the difference in the world!

And, Hudson is continuing to play "handy-man," wearing the tool-belt even over his pajamas. He is learning to appreciate a good DIY project at an early age!


Friday, June 27, 2014

Decorating for Zero Dollars

I remember about six months after we moved into this house, Jeremiah asked me, "Will the house ever be 'finished'?" I just smiled back at him and shook my head...I blame my mother - she is always changing things up in her home. I guess she taught me to do the same. It's how I clean (How else do you vacuum behind the couch unless you move it to the other side of the room?) It's how I keep from going crazy or wanting to go shopping everyday. I just move things around our home. It's why I keep random little cans of paint and paint supplies on hand at all times. I never know when an idea may come upon me. And I love when I can complete my vision/idea for zero dollars. Jeremiah doesn't mind the zero dollar part either - actually, he is awesome to let me continue to redecorate, move furniture, etc. He is always willing to hang a nail, remove a screw or reach something that I cannot. I'm so thankful for that! He is always so supportive of the things I love to do.


Today was a "redecorate the house" kind of day. Maybe it was the rain. Maybe it was the good night's sleep I had last night (which seems more and more rare during this pregnancy). Maybe it was the fact that my mother-in-love was here to help with Hudson. I woke up ready for some little projects. I worked on a bigger project that should get finished in the next few days, but I also was able to do a few little redo's around the house. 

My mother-in-love brought me a few treasures this visit. I immediately found a use for this vintage tea kettle. The inside was pretty rough looking - way past it's boiling water days. In fact, there is even a hole in the bottom (not ideal for making tea). But it was the perfect container to hold my growing aloe. 

Paired with a painted $1 squirrel and my great grandmother's griddle, I am loving my "new" centerpiece. My potted plant wasn't quite tall enough, but a few wadded-up grocery bags in the bottom of the kettle solved the problem. 

One side of our living room had been feeling a little dark. I was on the lookout for a tall lamp that I could place beside the couch. However, today, I remembered an older typewriter table that I had in the basement. 


Adding a lamp from storage, a canister of candy and a little tea cup - my dark corner is now lit and cute. 


The table, paired with a DIY pouf from Hudson's room also keeps my little explorer from climbing behind the couch. As I've shared before, some decor has dual purposes! 

Since my aloe plant from the tea kettle was needing to be re-potted, I decided to put one of the starts into a little tea cup. I love adding a "living" element to my decor. And since I really don't have a green thumb, I try to stick to cactus-type plants...because if I forget to water them, they will probably still survive!


As I was taking pictures of my now-well-lit corner, Hudson picked up on the fact that I kept moving something a tiny bit, then taking a new picture. He started moving the pouf a little, stepping back and then clapping, looking quite proud of himself. I couldn't help but chuckle. He really does watch everything I do!


To fill the space where my aloe plant once sat on my kitchen window sill, I pulled out an old painted "C." This item, originally from a thrift store, has been painted several colors and moved all around the house. 


I'm loving it's new location. It seems right at home beside my Christmas cactus (again, doesn't require much water!), thrifted shutters, DIY sign and soap dispenser. (And as I glanced back at some old posts to add the links here, I am SOOOO glad that I painted the walls "greige." I'm still in love with the wall color and glad that the blue is gone.)


I love that these areas of my house now make me smile. I also love that I was able to accomplish this happiness without spending a dime. I am so thankful that Grammy was here to play with Hudson while I rearranged and repotted. 


Who knows what things may change around here during the rest of her visit! 


Friday, January 10, 2014

$1 Kitchen Drawer Makeover

Things start changing in my house every January. Furniture gets moved around. Cabinets are rearranged. My pile of items to sell in the upcoming consignment sale grows. I blame a few factors.
  1. Its cold. I go out less. I'm stuck inside. 
  2. The Christmas decor is gone and the house seems dull. 
  3. A new year makes me want to reorganize. 
  4. As I put away Christmas gifts, I have to get rid of items that aren't being used. (Mom always said, "You get a new purse, you get rid of an old purse.")
I did get out of the house yesterday for a few groceries and diapers. While I was in Target I HAD to stop by that Dollar Spot. And, you all know I have a slight obsession with those awesome little rolls of $1 wrapping paper. (See what I did with some of that paper here). 


I have a rubber-like shelf liner in all my kitchen cabinets. However, it never stays put in the drawers. Plus, when I open a drawer, I see more of that boring colored rubber liner than when I look in my cabinet shelves. After chasing that piece of rubber liner around the drawers one too many times, I removed it. 


But I was left with a very unattractive piece of wood staring at me each time I put dishes away. I have found that it is so much easier for me to keep something organized if it is cute. I don't know why...but that's what works for me. That being said, I knew that I had to find a "cuter" solution.


One roll of patterend wrapping paper and some double stick tape were a perfect fix. I also love the fact that it took less than 10 minutes for me to re-line my kitchen drawers.  Quick and cheap.


Since this Herringbone pattern was quite linear, it was easy to get the paper almost the right size just by eye-balling it and cutting down one of the lines. Then, I would lay the paper in the drawers, creasing the excess paper in the corners. It was super easy to trim the paper along the creases for a perfect fit. 


A piece of double-stick tape in each corner of the drawer is currently holding the paper in place just fine. 


Sure, the rubber may have been more durable and the paper may rip eventually. But for $1, I can quickly redo the liners! And then, because it is something new and a different pattern, I will be motivated again to keep things organized.


I want to be on the lookout for some clear drawer organizers. I think it would be fun to keep my utensils in place but still see the cute paper underneath. 


The bathroom drawers and a few dressers may be getting a quick makeover as I continue organizing the house. 

I figure, if I'm going to be obsessed with a certain $1 item, I might as well find creative ways to use it around the house. While I had the roll out, I decided a fun patterned table runner would be another quick use for the paper. I'm having some friends over for card games and soup in a few days - 


I always love to add a little something extra to the table to make the meal seem more special. And if something is spilled on the runner, I don't have to do laundry! Just roll out some more paper.

How do you motivate yourself to stay organized? Have you found any fun uses for the $1 wrapping paper?

Thursday, December 12, 2013

DIY Pop Bottle Soap Dispenser

My sister and I have been talking. It is so hard to eat right this time of year. There are so many parties and get-to-gethers where lots of yummy things are available. And if I want to eat those yummy things, I've got to make sure I'm not snacking all the time at home. Winter is hard. You can't take your baby on a walk in the frigid temperatures. Everyone is posting these yummy treats and cookies. You just want to snuggle up and have a good, warm, sweet treat. In the evening, I want watch a lot of Food Network - and that just makes me hungrier.

SO...I keep adding more Christmas decorations and doing more crafts. I'm officially declaring it PROJECT: Keep Me Out of the Cookie Jar.

Here's one of those little projects...

While staring at the plain glass bottle that I had been keeping my dish soap in, I thought to myself, "I think a glass pop bottle might be kind of cute right there." I know that many people have the little metal stoppers (like an oil bottle might have) in their soap bottles, but I prefer to pour straight from the bottle.

I just so happened to have a glass Coke bottle from my Pa's store. He used to run a little grocery story and has quite the collection of awesome treasures.


I was satisfied with the change up for a few days.


Then I thought to myself, "It would be nice to have hand soap here at the sink." And after finishing up using my shampoo bottle this morning, I decided to see if the pump would fit on the top of another pop bottle.


I was so pleased that it fit right on top. Since this bottle was a 10 ounce, I didn't even have to trim the pump straw.

I have also added an aluminum bottle carrier that I had on hand.


Since there were more bottle slots, I thought I would put those to use as well. I was having a hard time getting my bottle brush and little scrubber to stand up in the holes. Adding a couple of the taller baby food jars made the back row of the carrier more functional.


I figure, if I've got to spend a lot of time washing dishes, I might as well make it fun!


 Especially when it didn't cost me a dime to do so.