Showing posts with label Guest Post. Show all posts

Wednesday, May 20, 2015

Guest Post: Painting Plastic Toys

My sister's BFF shared this fun project with me. It really makes me want to start hunting free plastic play equipment for the kids!

I love free things. I especially love free things that with one simple change can give whatever it is a whole new look. 


A few weeks ago my dad snagged some free Little Tikes play equipment from the job site he was working at and brought it over. If you are familiar with Little Tikes you know they use basic colors for their products and not exactly what I would think of as “cute” colors. I don’t have before pictures but here is what they looked like
.


 So I went to our hardware store and picked out the colors I wanted. I bought 3 different colors of Rustoleoum spray paint because it sticks to plastic. I wasn’t sure how much I would need so I made sure to get plenty ( I ended up using 3 green, 2 blue, and 1 purple).


The tree house had a few pins that needed to be taken out in order to take it apart. The picnic table  had quite a few nuts and bolts.


I sprayed down all of the parts and let them dry.

I then figured out which parts I wanted to paint each color and painted in groups. After letting them dry according to the directions on the can I flipped everything over and painted the other side. Some pieces needed another coat but others did not. Make sure you let everything completely dry ( 24 hours) before putting them back together. Since it is plastic the paint does easily scratch off. You may have to do some touch ups once everything is together. In the end you have bright, fun, and brand new looking toys for your kiddos. A super easy way to make those ugly plastic toys look cute!


Thanks, Jess for sharing your fun project with us. Here is another guest post Jess did a few years ago. 


Monday, April 20, 2015

Guest Post: Cora's Cozy Coupe

I love that technology allows me to keep in contact with childhood friends. When I saw what my friend Meghan made for her little girl's birthday (which is the same date as mine) I begged her to share it here on the blog.


 Meghan and I have been friends since childhood. Our dads were pastors on staff at a larger church in Ohio. We probably played together weekly, recording our own Adventures in Odysseys, pretending we were Olympic ice skaters and gymnasts,  and filming our own commercials. We were the same age and enjoyed the same things. And as you can see, we were quite fashionable!


Because of how much time we'd spent together, I figured there would be tons of pictures of the two of us. My mom helped me find a few...and it's obvious that we were pastor's kids! 

Meghan, Me, Amber, Alayna and Ashlee singing at church

All the pictures of us were either singing, speaking at a Mother/Daughter Banquet (with measuring tapes around our necks??) or going to church camp! ha. 

Stacie, Amber, Me and Meghan

Here's Meghan's cute project...


My newly 2 year old is pretty in love with Minnie. We were just a week or so from her Minnie Mouse party and I still had not decided on a gift for her.  Parties are expensive enough so I didn't want to spend a lot of money.  While party searching, I came across a post on Pinterest about a "Cozy Coupe Minnie Mouse redo" . ( don't you just love the satisfaction of doing things yourself rather than buying it?! Although my hubby swears Pinterest only exists to give him more projects .....but that's another subject!! ;))

I suddenly got inspired to search Craigslist and got lucky - someone had just posted a used Little Tykes Cozy Coupe that day for $25. Determined to get an even BETTER deal, I asked if they would take $15... and they agreed!

With my hubby's help we started the redo! Here is a picture similar to what the car looked like before.


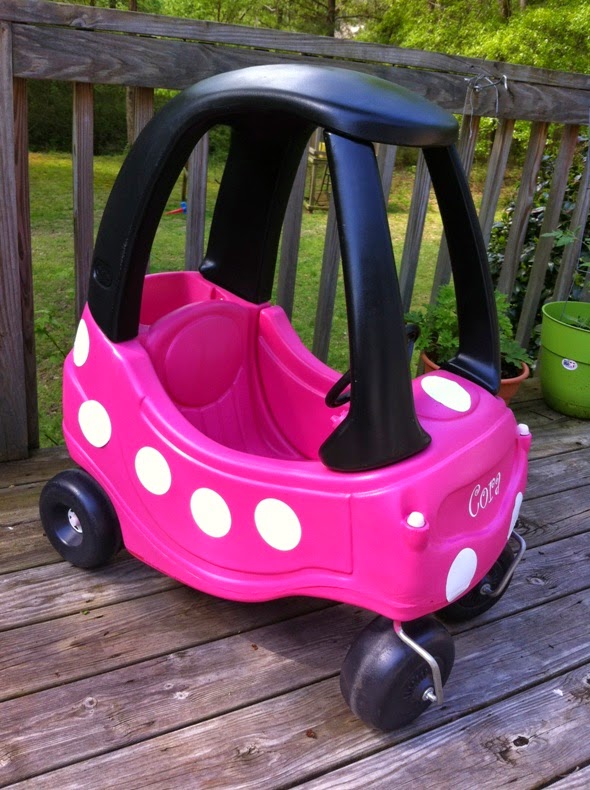
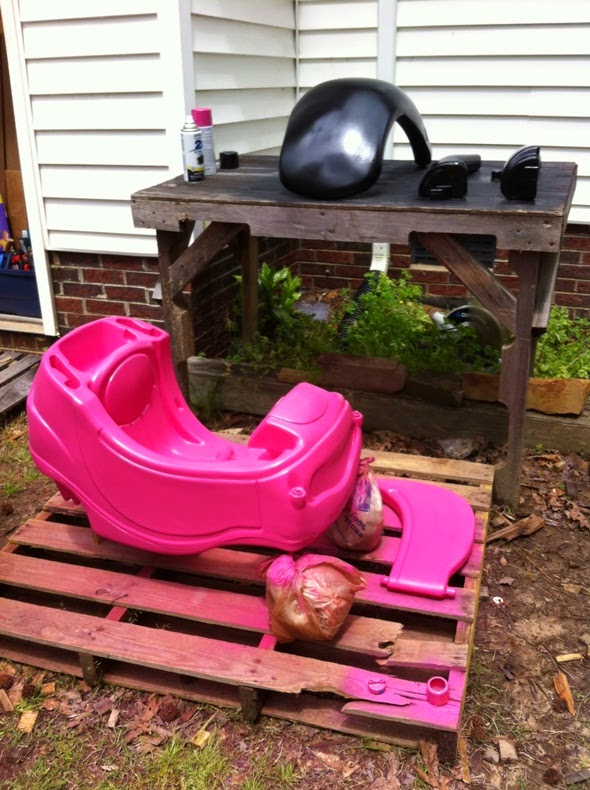
My hubby was able to pull all the needed pieces apart to paint the yellow parts black and the red parts a "Minnie Pink". Even the little horn on the steering wheel came apart easily!

We purchased these spray paints from Lowes ( around $3.50 a can) :


Although, I will say if you know something that might bond even better to plastic- use it! We haven't been super impressed with these even though it says it bonds to plastic. (which is why we did the extra clear coat).  It took about 2 coats of the berry pink and one of the black.

I contacted a friend who lives close to me and has just started up a cute vinyl store on Etsy and placed an order with her. She made us some dots and Cora's name with her machine so that we could attach them easily rather than try to paint it on ourselves! ( also what I saw done on Pinterest) Please check out their shop! They do great work!!

www.etsy.com/shop/lovelylittlevinyls

Message her about the dots and specific name and I know she'd love to accommodate you!


We assembled the car after it was dry and added the vinyl name and polka dots. Voila..... The perfect girly Minnie car for my sweet 2 year old!


Here she is on her birthday loving her new car!!


This has inspired me to maybe paint a play kitchen for a certain little girl of mine. 

Meghan and her husband have a really cool pallet art business here on Etsy.


They are super reasonable in price and accept custom orders!


Thanks, Meg, for sharing your adorably creative project!


Saturday, June 7, 2014

Guest Post: How to Glaze Furniture


I've admired this furniture re-finishing technique for some time. In fact, I think my coffee table has even been glazed (I bought it at a yard sale). When glazed, all the details and lines in the furniture piece really stand out. When I saw that a friend of mine was glazing a beautiful jelly cabinet, I decided we should all learn how to do this ourselves.


And so, my friend Evelyn shared her wisdom:

Make sure that the furniture you are planning to refinish is clean and dry. I use dish soap and warm water. 


After completely cleaning your furniture piece, paint it with a chalky-like paint. 


I paint one even coat. The areas that are a little thinner are the ones that distress easier. I use a chalky-like paint because there's minimum prep work involved (such as no stripping, sanding or priming) and it dries fast.  Once the paint is dry, lightly sand with a fine sanding sponge to distress certain areas as desired. Be sure to lightly sand across your entire piece of furniture. It should feel smooth when you run your hand over it. 


Now you are ready to glaze. I used Bharr Glaze and Bharr paint color, Aging Barrel here. Mix one part color and three parts glaze. Apply to the furniture piece in sections. With the cabinet, I glazed one door and wiped it off with a dry cloth.  (Or on the coffee table, I simply applied the glaze to the top first.)


Then I did the other door. I applied the glaze to the top, then wiped it off before moving to the entire front - and then wiped that off.  Lastly, I did one side, and then the other. Remember to glaze the insides of the legs and under the edge - or anything that might show. I use a paint brush, making sure to get the glaze mixture into every groove. 


Let the glaze set for a few seconds before you start removing/wiping it. Be careful to not remove too much, but also make sure that you do not leave lines or streaks. If you feel it is not heavy enough, reapply. Also, if you feel it is too much or too dark, quickly wipe off with a wet cloth. 


Do not be afraid - you can always paint over it if you are not  completely satisfied with your results


When the piece is completely dry, wax it. 

And FYI: the table pictured above is still for sale in her booth! (See below for address/location)

I'd love to know if you give this technique a try! I'm contemplating a picture frame for my first attempt. If I am successful, I may move on to a dresser.

If you love the look of this but are hesitant to try it for yourself, you can always just purchase something Evelyn has completed for you (such as that beautiful coffee table pictured above)!  She has some of the cutest re-creations! And it's unique decor that makes each house feel more like a home.


You can find Evelyn's work at her booth: HooNew in RedBriar Antiques in East Ridge behind Cracker Barrel. 6501 Slater Road. East Ridge, TN. Their hours are Monday - Saturday, 10-6 and Sunday 11-6.

She also has items for sale at Reeves County Market. 1856 Cloud Springs Road, Rossville, GA. Open 9-6.

Wednesday, December 11, 2013

Guest Post: Glitter Birthday Candle DIY

Hudson's little friend, Giada also celebrated her first birthday recently. They were born within 24 hours of each other. 

Giada's mom made the sweetest candle for her birthday cake. Here's how...

I wanted a cute candle for Giada’s Pink Ombré cake.  However, all the candles had lots of bold colors or didn’t match what I had envisioned.  I just wanted a plain candle! 

So, my cake decorator suggested this idea.  I was so excited that I could decorate the candle exactly how I wanted. I bought a regular #1 candle, Elmer’s rubber cement, and fairy dust sparkles.

I was so excited…but the outer lining of the candle was showing up because my sparkles were such a light color.  


I almost gave up on my sparkly candle dream.  Then my mother in law suggested scraping off the outside.  Brilliant! It’s just wax, right? Now, the candle was plain white, I added more rubber cement, and LOTS of glitter.  


The candle worked perfectly and matched my princess’ cake!


The whole party was adorable!


And, of course, Giada looked adorable too!


Thanks, Barbie, for sharing your easy project!

Check out her other guest post here (Travel Tips with a Baby)! And you can see Giada and Hudson at their first play date here. 

Monday, July 1, 2013

Guest Post: Traveling with a Baby (5-6 Months)


While planning our up and coming family vacation to the beach, I decided to ask some of my new-mommy friends if they had picked up any tips during their travels. Hudson's friend Giada (who is one day older than him)'s mommy had lots of good advice to pass along. 

Two Month Old Playdate (See more pictures here)


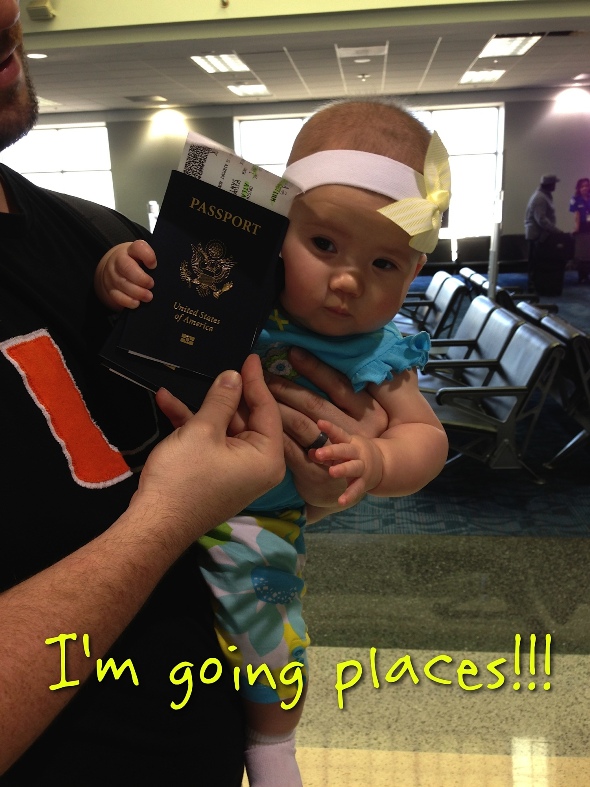
So my husband and I took our sweet baby girl (5 and half months old) on a 3 week adventure.  Giada experienced the Dominican Republic with our amazing college students, a beach trip to Miami , and a trip to see my parents in Delaware. We calculated over 40 hours logged in the car.  We cannot complain- she did great! But we learned a lot of tricks and tips!!!

Tips for Airplane Traveling:
1. First, be calm! Even though it's your first time traveling with a baby, other people have seen babies on planes!


2. Pack only what you are willing to lug around and carry plus a baby in the airport. (Some people take  a stroller. I didn't because my in-laws had one at our final destination.)

3.Right around take off time, feed your baby (nurse, bottle, or paci if they are not hungry).  I did read one tip - if they are already asleep, leave them. The baby will not be affected by the pressure. That proves true because my sweet Giada ate and fell asleep before the plane took off. She slept a good 2 hours!


4. Take fun toys or let them play with the cups the  stewardess brings by. (You'll do anything to keep a baby entertained!)


5. If your baby cries, it's okay!! Just do what you can to console them and know people understand. 

Tips for Taking a LONG LONG Road Trip:

1. Pack everything your baby owns...just kidding - it does feel that way....     But really, count how many days you'll be gone and lay out outfits for you baby. Then take extra for...well you know accidents, blowouts, spit up. You're a mom, you know this stuff can AND will happen! (Lots of wipes, diapers, etc. and google a packing list like this: http://www.babycenter.com/packing-checklist-for-traveling-with-baby)

2.Be prepared to change your baby anywhere - especially your car. Believe it or not, many gas stations do not have changing tables!


3.Pack all kinds of fun toys and be sure to leave room in the backseat for you or whoever isn't driving. I promise there will be some fun games of entertaining and verses of "Old McDonald" in your near future. 


4.Travel when your baby is either happy or sleepy. Now, this isn't always possible when you are driving more than a few hours - that's where "Itsy Bitsy Spider" comes in. BUT plan the big chunks of traveling around a nap or bedtime to get some good mileage.  We also broke our trip up into several days. The most we traveled in 1 day was about 8/9 hours. It's a little more expensive this way, but I think it works better for you and the baby. 

5.Get Starbucks. Often. Whenever the baby needs to be changed or fed, you deserve a treat!

Tips for Taking a Baby to the Beach:

1.Get a really good sunscreen. I researched and asked my doctor what was best. I chose the Coppertone Water Babies (SPF 50). I tested it on my baby's skin (legs) a few days before to make sure she didn't have a reaction. 

    *Beach day - put on at least 15 minutes prior to heading in the sun and reapply often!


2. Buy: waterproof diapers, a sun hat and sunglasses.  Also, a float is always a plus to giving your arms a break and letting baby relax a little. 


3. Take an umbrella and a sheet/blanket for you and baby to relax. You will be amazed at how quickly the sun and water tires your sweet baby. 


4. Some people take a bathtub or a mini pool for the baby to sit in. We were never there all day so we didn't try those. But I can see how they would be very helpful and entertaining. 


5. Realize it's a different kind of vacation with a baby. You may not get to lay out the whole day and get a tropical tan BUT you are making memories and introducing your baby to beach life. So make it fun!!!


**Last travel tip no matter where you go...your baby's schedule will get off track with traveling. If you know this ahead of time, it makes it a lot easier on you. I promise when you return home they will eventually get back into their "normal" routine within a few days!

Best of luck and have lots of fun making memories with your family!


Other advice I've received: 
·         Getting a baby tent like this for the beach.
·         Pack everything! It just makes life easier and more relaxing to have your favorite things there at the beach house (play mat, bouncy seat, toys, etc). It may be more difficult on the drive there but very worth it when you arrive. 
·         Take turns with who stays at home with the babies and who goes to the beach. This keeps the babies out of the heat and sand and lets the parents have some time to not have to worry about checking on the baby every 5 seconds. 
·          Bring baby powder to help get sand off babies. 
It's going to be different....but it's going to be fun! We can't wait to take Hudson on vacation.
  

Last summer, I did a post on packing tips. You can check that out here.