Showing posts with label Sewing. Show all posts

Tuesday, August 2, 2016

Fabric Covered Bible

I was stocking up for the up-coming MOPS year at Hobby Lobby this morning when I spotted the prettiest fabric ever! And so I bought a yard! Those that know me know...I HATE sewing. I love the idea of it. And I come up with millions of projects that I usually have to have my mother-in-love help me execute. I have a machine. I can sew pillows and simple things, but I usually finish the project so angry. I am a bigger fan of hot glue!

I am proud to say that I was able to use that fabric during nap time on the same day that I bought it! Other yards of fabric are still folded neatly in a stack in my craft cabinet.


My parents had given me this New Living Bible with wide margins for my birthday. It has some adorable illustrations for key verses already drawn in. I am loving it! I can write devo notes in the side or even sermon notes. Even though the cover is cute, it just didn't feel like "me."


Following this simple No-Sew Fabric Book Cover Tutorial, I put my hem tape and iron to work!

The Bible slipped into the cover easily -  I love that it's not permanent. So, the next time I walk through Hobby Lobby and spot more fabric that I "just have to have!" I can make another cover!


And there's no zipper or buttons or handles to get in the way during a Sword Drill (anyone remember those?).  I never wanted a Bible cover growing up because it slowed me down. My Sunday School teacher even had these pads that sat on our chairs and would indicate who stood up first. It was a serious thing! 

I might even make my journal and ipad match! One yard of fabric would easily have covered 4 of these sized Bibles. 

Wednesday, September 2, 2015

Magnetic Pin Dish

When I decided that we would be using needles to sew the button onto our journals for the MOPS Kickoff (see the Cereal Box Journals here), I knew that I needed a landing place for those needles.  I had originally decided to make some type of pin cushion, but I thought that a magnetic dish would be easier - both to make and to drop the needles onto.


Using a regular glass saucer that I had on hand, I glued several strong magnets onto the back side.


I used a strong glue like this one to hold the magnets in place. I glued one magnet at a time, letting it dry for at least thirty minutes before adding another magnet. Otherwise, the magnets would have pulled together.

A stronger set of magnets would do a better job - but I used the magnets that I had on hand.


It made for a great landing place for the yarn needles, and it was easy to make.


Wednesday, August 12, 2015

No-Sew Glider Cushion Cover

I've had Hudson's glider in Nora's room for several months, but I am finally able to say that it matches her decor.


I had originally purchased this glider for $25 from a local thrift store before Hudson was born. It looked as if it had never been used. My talented mother-in-law covered the ugly 90's blue cushions to match Hudson's room. I loved it.


But it didn't match my green theme in Nora's room.


I have a sewing machine and I can sew straight lines, if forced to. However, I usually end up frustrated and ready to throw the entire machine off the back deck. In order to avoid another battle with the sewing machine, I've had a blanket draped over the cushion for the last several months. It looked lumpy and would just be a mess after one middle-of-the-night rocking.


While I was putting away some laundry yesterday, I had an idea. I had purchased a green dotted crib sheet at a yard sale for $1 because it matched Nora's room.


Since her bedding already has lots of patterns, the sheet has just been sitting in her drawers. I'd figured I could make a pillow out of it some day.


I didn't have to cut it or sew it or manipulate the sheet in any way. I simply stretched it over the cushions and tucked it around the edges firmly. The elastic around the edges held it in place magically. Nora thinks it fits nicely.


And, it looks like I sewed a new cover...but I didn't. This will also be super easy to wash in the event of a spit up or some other kind of mess.

I'm still loving the changing table being in the closet. It leaves her room feeling open and spacious. And, I can close the closet doors for an even cleaner look. (PS. Is anyone else obsessed with those green IKEA laundry baskets? I love leaving one on the bottom shelf of her changing table for her dirty clothes.)


All other aspects of her room are still pretty much the same. Her crib is sitting quite a ways away from the wall, though. She likes to beat on or scratch the wall when she wakes up.


And she's also pulled off a few of my gold bulbs on her marquee letter. I've just got to hot glue those back in place.


I love that she is growing into a little lady. She loves to cross her ankles when sitting. She is on the move these days, pulling up and getting into everything.


Since she moved out of the baby nursery on Sunday, I transitioned her to "Big Girl Bag." I love seeing it hanging on her little hook by the door.


I can't believe that she is already 11 months old.


Guess it's about time I got her glider cushions covered. I just wish I had thought of this simple solution sooner!


Sunday, May 10, 2015

I want to remember these little hands

Usually, the Sunday before Mother's Day, I panic. WHAT AM I GOING TO SEND MY MOM AND GRANDMAS???? But this year, people kept asking me, "Are you doing anything fun for Mother's Day gifts?" I started thinking early! I knew I wanted to incorporate hand prints, but I knew that Nora was not ready to participate in a bunch of paint hand prints. I was sure I'd MAYBE get one good one and the rest would not resemble a hand print at all.

I want to remember their little hands. I wash them daily. They hold my fingers and touch my face. They reach for me to pick them up. They clap when they are excited. The do the motions to their Bible verses. They help me pick up toys. I spend a lot of time looking at these little hands.


I decided to stitch their hand prints on tea towels. I know that these hands won't stay little forever. And I wanted the moms in our lives to have a way to remember those little fingers.


I purchased red striped tea towels at Walmart (2 pack for $1.97). I traced the kid's hands on paper and cut out the shapes. After tracing the hand onto the towel, I stitched around the outline with embroidery thread.


If I was super focused, each towel only took about 30 minutes to complete. I added the year at the bottom of the towel, and I designated who's hand was who's with their initial.


Hudson helped me color the cards for each of the mom's in our lives. I signed each note "Love, Nana's Helping Hands - Hudson and Nora" or "Love, "Grammy's Helping Hands - Hudson and Nora." It was a memorable but inexpensive way to capture the memory of my kid's hand prints and let these ladies know how much they mean to us!

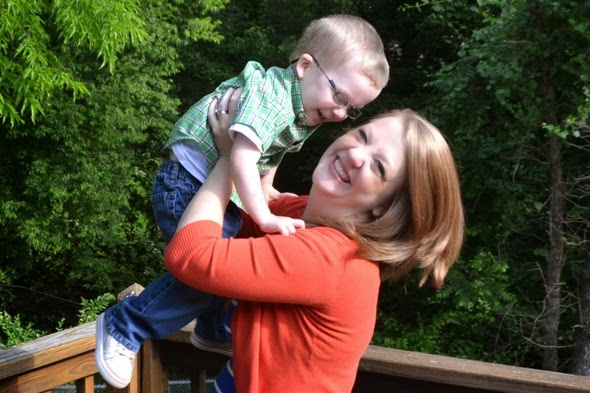
Since Hudson was born, I've taken pictures with him on the deck every Mother's Day. I decided to try to have Jeremiah take our pictures before church this morning. Despite the bright sun light, I hoped to have a few images to remember this day. And I thought we might not all be dressed in the same outfits after church.  Spills happen a lot at this stage in our life.


I am so thankful for these two little blessings that the Lord has given me to raise.


Although some days (and nights) are super long, I still think being their mom is the best job in the world.


I am so thankful that my husband works so hard, allowing me to stay home with our babies. Each moment with them is a gift, and I appreciate his sacrifice.


For as long as I can remember, I have wanted to be a mom. I know I had the best mom ever - and I always dreamed of having the opportunity to love and nurture kids of my own. She taught me so much by her words and example. I pray I am able to influence my children they way she influences me.


So whether it's wiping fingers or picking up cheerios...I have decided that these are some of the best days of my life.


And some of the sweetest words I heard all day came from Hudson... "Happy Mudder's Day, Mom...I wuv you!"


I am so thankful that the Lord picked me to be Hudson and Nora Lynn's mommy. 

Saturday, July 26, 2014

N is for Nora and her Nice Little Bed

Although I still plan to add to this side of the room, Nora's sleeping area is looking more and more complete.


My curtains in this room are nothing new. I purchased them from Ikea shortly after we got married. (I think they are now discontinued...but might be available on ebay, etc.) They've decorated my dining area in the apartment, the guest room here, and now Nora's room. While this was strictly the guest room, I highlighted the red/pink berries with a red quilt on the bed. I knew that I wanted the green to be the star of Nora's room.


My mother-in-law sewed this beautiful bedding to compliment the curtains. I took a portion of the curtain fabric and picked out three coordinating patterns. (And I only have this blurry ipad picture to show my choices)


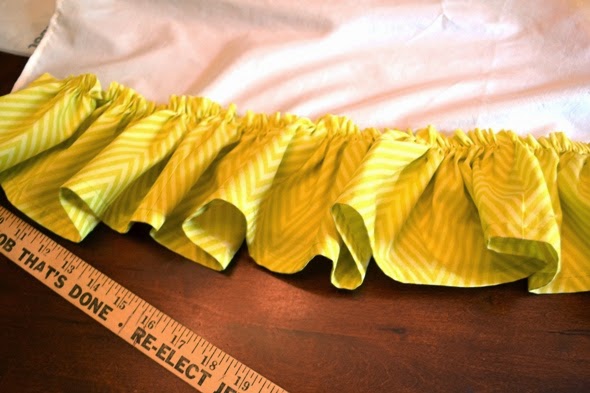
Using ideas from blogs (like this and this) she covered an older bumper pad and created an adorable ruffle skirt.


The skirt is made in such a way that as we lower the crib, we can re-tie the skirt to a different height, keeping it from dragging the floor.


I love that I also have the option of storing extra diapers or outgrown clothes under the crib. It will be neatly hidden beneath the pretty ruffles. The bumper pad is also reversible.


I knew that I wanted to hang a faux marquee letter over her bed. If I was super talented in the electrical department, I might have attempted to make one of these letters with real working lights. It would have made the cutest nightlight. But, a hot glue gun is my favorite choice of tool - so a faux letter was what I attempted.

I purchased a cardboard letter from Joann's ($5 after a 50% off coupon).


I've been holding on to some clearance Christmas ornaments for a few months for this project. They were originally $1 for 15 balls. I think I purchased these for 90% off at Dollar General.


With a regular pair of scissors and a box cutter, I removed the top portion of the N.


Those squiggly cardboard fillers entertained Hudson for a good 5 minutes while I worked on this project.  I also removed the top of each Christmas ball.


This now flat edge made them stand nicely inside the letter.


I laid out my "bulbs" in order to figure out the right spacing. I had originally planned to alternate the shiny ones with the frosted bulbs.


P.S. I love having this extra little painted table in the basement. I can start a project during naptime and easily walk away from my mess. It's nice to not have it all over the kitchen table, having to move it for each meal.

My BFF, Ashlee painted the N white for me. She painted the shelf seen beside the crib at the same time. I am still deciding what will be on that shelf.


In the end, I preferred the look of just the frosted ornaments. I laid them out and drew a little dot with a pencil under each ball.


A bit of hot glue held them securly in place.

Since this is just cardboard, it is super light weight. Using command strips, I simply stuck the N to the wall above the crib.


I hope to add a simple mobile over the crib, as well. And there will be cute things on that white shelf...soon. I picture a cute hamper underneath.


Little by little, this room is getting finished. I am loving every minute of it.