Each Christmas, I try to find an inexpensive, but personal gift to give family members and close friends. Last year, I made these framed names.
This year, thanks to Pinterest, I ran across this idea. I had originally hoped to find a Cricut cartridge of the nativity to use. But all the ones available were not to my liking. I talked my neighbor/BFF into also making these for her family for Christmas - Ashlee is excellent at drawing/copying things. After some internet browsing, she sketched out the shapes we would use for our characters. Inspiration came from a few different places...the camel was even copied off an animal cracker.
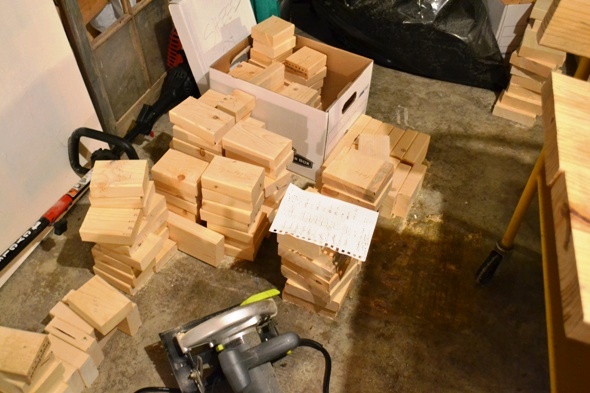
We simply traced the shapes onto different wrapping papers to decoupage onto the wooden blocks. I figured out the measurements for each character. We then contracted out the cutting of the wood - our handy husbands helped us to purchase and cut down the wooden planks into the appropriate sized blocks. They worked so hard on our crazy idea.
I then began to sand away the rough edges of the blocks.
I couldn't have done it without this little handy sander handle...
A few episodes of the Pioneer Woman also helped pull me through the long hours of sanding.
I'm also thinking of other projects that I can use this technique for...If I can only sweet-talk my husband into cutting me some more 2 by 4's.
This year, thanks to Pinterest, I ran across this idea. I had originally hoped to find a Cricut cartridge of the nativity to use. But all the ones available were not to my liking. I talked my neighbor/BFF into also making these for her family for Christmas - Ashlee is excellent at drawing/copying things. After some internet browsing, she sketched out the shapes we would use for our characters. Inspiration came from a few different places...the camel was even copied off an animal cracker.
We simply traced the shapes onto different wrapping papers to decoupage onto the wooden blocks. I figured out the measurements for each character. We then contracted out the cutting of the wood - our handy husbands helped us to purchase and cut down the wooden planks into the appropriate sized blocks. They worked so hard on our crazy idea.
I then began to sand away the rough edges of the blocks.
I couldn't have done it without this little handy sander handle...
A few episodes of the Pioneer Woman also helped pull me through the long hours of sanding.
It was then only a matter of painting the blocks the right color to match the wrapping paper cut outs. Modge-Podge was the perfect adhesive for the wrapping paper.
We tied a little bit of twine around baby Jesus - making Him stand out from the other pieces.
For a while, we had piles of nativity sets all over the house...even in the nursery.
I was so glad that I had finished these sets before Thanksgiving. I was able to pass them out to my family then so that they could enjoy it the entire month of December.
And, when our baby came early, I was DOUBLE glad that this project was complete. I also kept a set for myself.
The project was fairly easy. Each set only cost us $3 each since I already had the paint and wrapping paper on hand. I also love the fact that kids can play with this set. Too many Nativities look like toys, but are glass and can't be touched. But this set is quite durable!
Ashlee made some adorably colorful ones...
I've also loved seeing where different family members have placed their sets.


.JPG)

I love these!!! That is such a neat gift! :-)
ReplyDeleteI love how well they turned out!
ReplyDeleteVery cool. Elisabeth
ReplyDeletewhat a great idea!! I told my mom about these because I thought they were so neat!
ReplyDeleteHoly Cow! These are AWESOME! What a fun gift idea!!! Thanks for sharing!
ReplyDelete